Elyssa and I had a little discussion on just what exactly, I was allowed to feed the chickens. It went something like this:
"Elyssa, when you take out the food for the chickens, make sure you take out this gravy and bread."
"But mom," she said "It has cream of chicken soup in it."
"So what! Just take it out." I told her.
"But mom, they are not cannibals!!!!" she informed me rather passionately. I countered with "Yes they are, they eat their own eggs, they don't care!"
"But mom, EGGS are not chicken!" I started getting agitated "Yes, they are!" ah this was not going in the right direction. "But mom, there is no rooster, so it is not chicken yet..."
(Oh, I clearly thought that she was still my baby girl but, I was sadly mistaken. She quite assuredly knew more about reproduction than I thought.)
Once again I countered, "I am going to ask a question. I am a human woman and I have eggs inside me. Does that not make my eggs human tissue? Even when there is no rooster around? aka daddy." she answered with a timid "yes" "Alright." I said, "a chicken egg comes from chicken tissue, therefore it is chicken!"
Booyah!!! I win!
Ok, I did not say that last part but I thought it...
Needless to say she had nothing more to add to her argument. And I will feed them all the table scraps I want, chicken included! Because from table scraps, come big, beautiful eggs for my breakfast plate.
Monday, February 20, 2012
Monday, February 6, 2012
A Return
It is time to return to the Photos of the Month Club.
I have so missed doing a post at the end of every month,
documenting all of my most favorite photos.
As it is I am a few day late getting this post put together.
Bob or Sprout enjoying a wheel barrel full of fresh hay.
I am still getting white eggs every day! They are huge ranging from 2.5 ounces (jumbo) to 3.0 ounces.
The brown eggs have stopped all together. Not sure what that is all about.
The chickens are doing great with the cold weather.
January 1st, 2012
First real snow and it was scarce,
still we took advantage and went sledding.
January 7, 2012
Just us
January 7, 2012
The funky little window high up in the kitchen wall.
My mom brought these glass owls bookends to me from a friend that was getting rid of them.
I LOVE them soooo much.
They easily double as a weapon if you can lift them.
Jan. 10, 2012
Yummy!!!
My girl made these all by herself.
Chocolate cupcakes with a mint butter cream icing and a semi-sweet heart.
Jan. 26, 2012
Wednesday, February 1, 2012
Our First Toy Drop
Yesterday we completed our first ever toy drop. We joined The Toy Society, and made a drop.
My girl is very interested in sewing these days and it seems there is an abundance of little stuffed toys floating around here. What to do with all of them? Hmmmm, a toy drop was just the answer I was looking for.
It works like this, All toys must be handmade, include a toy society letter and a tag, and must be dropped in a place where a child can find it. Then you take photos of the drop and post them to the flicker group. The photos are then assigned a drop number and will be posted to the DROPPED section of the Toy Society Blog. The recipient can do the same thing and they will be posted to the FOUND section of the blog.
Here is a description of the Toy Society from their Blog. visit the toy society
"The Toy Society spreads love throughout the streets of the world. Nothing to it really just a bunch of handmade toys looking for a nice home.
What started as a small street art project in Australia is slowly spreading around the world.
Should you come across a member of The Toy Society on your travels collect them up and take them home with you! But don't forget to let us know about it here."
We left her at the library in the JF picture books section on a shelf where she would hopefully be found quickly. We included a letter from The Toy Society and the envelope said " OPEN ME".
My girl is very interested in sewing these days and it seems there is an abundance of little stuffed toys floating around here. What to do with all of them? Hmmmm, a toy drop was just the answer I was looking for.
It works like this, All toys must be handmade, include a toy society letter and a tag, and must be dropped in a place where a child can find it. Then you take photos of the drop and post them to the flicker group. The photos are then assigned a drop number and will be posted to the DROPPED section of the Toy Society Blog. The recipient can do the same thing and they will be posted to the FOUND section of the blog.
Here is a description of the Toy Society from their Blog. visit the toy society
"The Toy Society spreads love throughout the streets of the world. Nothing to it really just a bunch of handmade toys looking for a nice home.
What started as a small street art project in Australia is slowly spreading around the world.
Should you come across a member of The Toy Society on your travels collect them up and take them home with you! But don't forget to let us know about it here."
This whole Project gives me something to do with all of those hand made things my daughter is creating, and gives her an outlet for all of that creativity.
Our First DROP!
This is Sophia, she has been sitting in a little bin in our craft room for about a year. Such a lonely girl! I really hope she found a sweet little girl to play with.
Currently we have a few little jelly fish, and 3 birds ready to be put into their little bags and be dropped. Elyssa is making a mouse as we speak!
Wednesday, January 4, 2012
Decisions, Decisions
The hubby keeps a photo in his wallet. Yes, just one.
A photo of his babies. He does a little mini photo shoot with the kids and his motorcycle. All of his babies in one shot. And then he gets one wallet size, to carry around with him everywhere.
My problem is that I am having a hard time deciding which ones I want enlarged. There are so many. I just don't know what to do. Maybe I need a really big copy of all of them. I probably should narrow it down to just one or two or three. Ok maybe 3 would be a good number to have.
One of the girl.
One of the boy.
And one of them together!
Perhaps something fun?
Oh decisions!
Tuesday, December 27, 2011
Christmas 2011
So December has come and is nearly gone! Christmas came with it. And sadly it has gone too. Here are the pictures that we get to keep to remember our Christmas 2011.
Firstly The last weekend of November found us at the Festival of Trees, a fund raiser for the Primary Children's Hospital in SLC. It is a huge event with so many decorated trees, in every theme you can imagine. Very inspiring! Plus they had gingerbread houses, quilts, wreaths, mantel displays, gift boutiques, and an area for mini trees. My mom and I went and we took Elyssa with us. We were so exhausted by the time we left, but we had a ton of fun. So that means I had to come home and get our tree up the next day. We wanted bright colors this year but also some animals. I saw an idea on pinterest that I just knew we needed to make. In early November,we went to our local thrift store and dug through all of the toys to find the little plastic animals. They only charged us $1 for a basket full of them. Then we came home and glittered them and put them away until time to decorate the tree.
The next thing we did was to make crystal snow flakes. Borax Snow flakes, they were so easy to do and doubled as a science experiment.
And about that time we had the tree up so we were able to hang them. Our decor is relatively simple and not too involved.
Another idea I found on Pinterest and decided would have sufficient impact with very little work involved. Hanging different lengths of different colored ribbons on our mirror and tying ornaments to them. And on the same mirror just below the ribbons is my favorite piece.
With our stocking below that. We don't fill our stockings, they are purely for decoration.
The next weekend My mom and Elyssa and I went to another expo to do some shopping, and just hang out. We had a lot of fun. and found some nifty, inexpensive gifts.
Justin and I went to his company Christmas party at the little America Hotel downtown, always a fancy affair, we look forward to having this date night all year.
Then there was the night I got to go and take photos for Justin's brother and his family such fun times!
Then it was on to the cookie baking.... Justin's schedule changed so we had some adjusting to do while he worked nights for a bit. This was the perfect time for me to bake and decorate cookies. Kept me occupied while he was gone in the evenings.
and when it was all said and done I had 10, gallon sized ziplock bags full of cookies.
Elyssa made a few cookies worth mentioning,
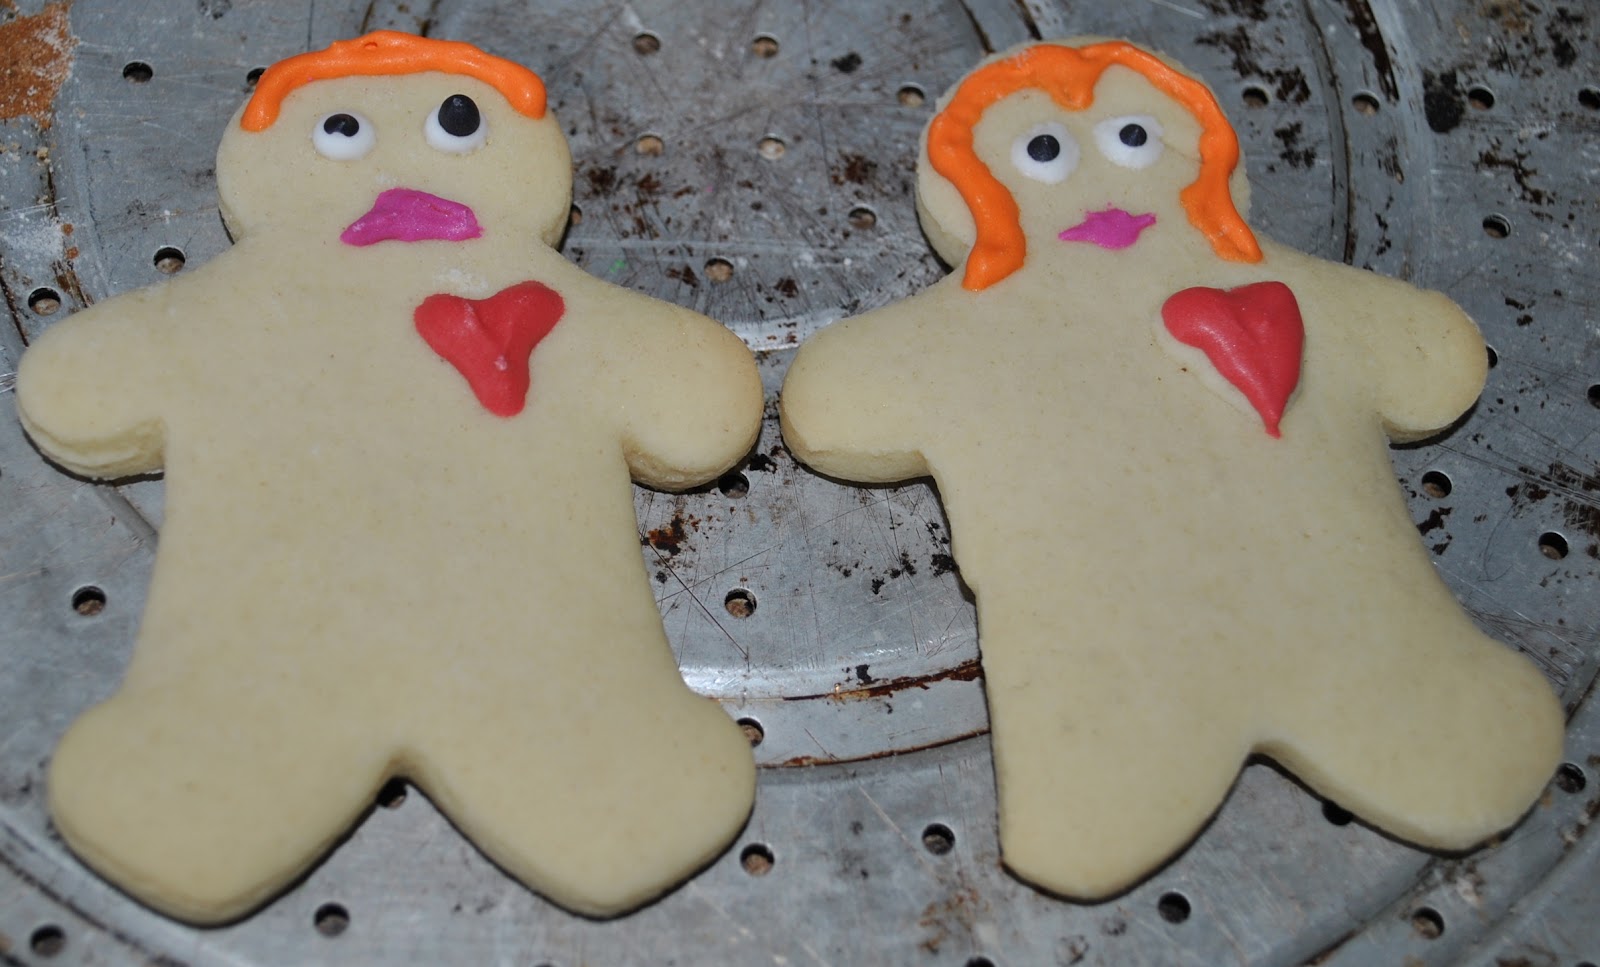
Well we have Adam and Eve apparently before the fall...
And our Chickens made the cut.
And these cookies I made for a friends who gets to have that long awaited reduction!
Happy Bra shopping D.A.
Dixie doodle decided sleeping under the tree was her new favorite thing to do.
Elyssa made several of these drawings for her brother and aunt and uncle.
Ashton LOVES his!!!
Christmas Morning, The most beloved gift.....
a rolled up raw hide chewy of course!
And Christmas night, after our movie (Marley and Me)
Time to learn a new song, Deuling banjos.
Wednesday, December 14, 2011
Pear Frangipane
This is a recipe for a pear tart that is pure HEAVEN!
It is simple, has few ingredients and fast!
Using your food processor makes it go really quick.
Pastry
1 cup flour
1/4 tsp salt
6 tbsp. cold butter cut into pieces
2 tbsp. ice water
In a food processor bowl combine, flour and salt. Pulse to mix. Add butter and pulse until it resembles coarse meal. Add ice water and pulse until a ball of dough nearly forms. Gather into a ball and wrap in plastic, chill 1 hr. (less if flattened)
Preheat oven to 375*F
Roll out dough and place into a 9" tart pan, pressing dough up the sides. Bake 20 minutes, let cool.
Frangipane
6 tbsp. butter
2/3 cup sugar
3/4 cup ground almonds
2 tsp. flour
1 tsp. cornstarch
1 egg
1 egg white
1 tsp. vanilla extract
1 tsp. almond extract
3 soft, ripe pears, (peeled, cut into halves lengthwise, and cored)
In food processor bowl combine butter and sugar, process til smooth. Add almonds, flour, cornstarch, pulse to combine. Next add egg and egg white along with the extracts. Pulse until well blended. Spread frangipane in cooled crust, slice pears and nestle into the frangipane and spread the pears out. but do not separate them.bake 40 minutes or until the frangipane is set, and golden brown.
Tuesday, December 13, 2011
Easy project makes a great gift!
LOVE, that is it.
ok, well maybe a camera and some kids and some frames. And in about 2-3 hrs you can have a timeless gift ready to go.
First I printed out some letters on cardstock. I used the letters L-O-V-E. I printed them using the Georgia font, at a 700pt. They turned out great.
Next I had the grand kids line up and I took the pictures out side in the freezing cold. I had each kid hold each one of the letters. And I took multiple photos, just to make sure I got great ones I could use. So that would mean a minimum of 16, but in reality I took about 120 pics in 10 minutes. (Why was our photo shoot so short? Because it was about 20 degrees outside and we were FREEZING! And Ice crystals were starting to fall out of the sky.)
Then I went in and cropped and edited them. I wanted black and white photos so it was really easy to do. Next I uploaded to Costco.com and had 8x10's printed out. I picked them up added some cute frames and voila! Beautiful, meaningful gift. I was so happy with the way they turned out.
This is an awful picture of the finished product. They look so cute and this photo does not do them justice.
So, to see the photos how they really appear see them below.
I was really close to the kids and tried to take shots that were from the waist to the top of the head or a little higher. Also I wanted to get their personalities to shine through the photos. I did not care if their eyes were not wide open, if they were having a genuine laugh going on. I was teasing and snapping photos and making the kids laugh as fast as I could.
I also looked for interesting backgrounds, knowing we were going to do the photos in black and white, I wanted some visual interest. Texture!
I think this is a project anyone can do if you have the time to plan ahead and have a few hours.
IT!
Subscribe to:
Posts (Atom)